The standard ASP.NET validator controls such as the RequiredFieldValidator or the RegularExpressionValidator do not cover all validation requirements, so usually developers tend to create a CustomValidator for such scenarios.
A major problem with the CustomValidator is reusability, as if you wanted to use the validator in another project then there would be some copying and pasting and code duplication, then you have to maintain multiple versions of the same control.
The solution, as you have guessed from the title, is to build your own validator control when possible to promote reusability.
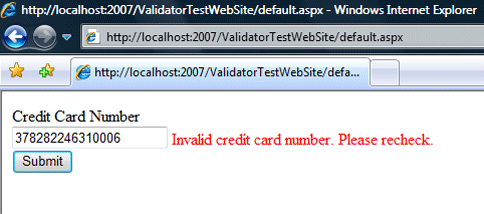
In this post I will be showing you in three simple steps how to build an ASP.NET validator control and take credit card number format check to show by example. I will also be building the architecture so that your validator and other validators that you will develop in the future could be as reusable as possible.
How to Check a Credit Card Format
Luhn check is an algorithm that checks if a credit card number is valid (format wise), so in practice, before you even think of doing any further processing on the credit card, this check should be satisfied.
Introduction to ASP.NET Validators
ASP.NET validators are ASP.NET controls that when associated with a web control will perform client-side (JavaScript) and server-side (C#/VB.NET) validation.
Using them will dramatically reduce the amount of validation code and will helps in writing more maintainable and clean code. The more specialised controls that you have the more you will finish building a form faster.
All what you need to do is check for Page.IsValid in the server-side (in our case that would be the code-behind file) to make sure that the page is valid before you start collecting its values.
Step 1: Prepare The Class Library to Include the Validators
You will need a class library to host your validator, this class library will be used to add additional validators in the future. The library will contain a JavaScript file that will include the required JavaScript and will be served whenever the validator is used.
Add The Class Library

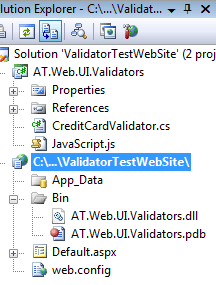
Create a new class library, mine is called AT.Web.UI.Validators then add a reference to System.Web and remove the auto generated class class1 from the project
You will need to add this line to the end of the AssemblyInfo.cs
[assembly: TagPrefix("AT.Web.UI.Validators", "at")]The previous line will append the prefix “at” to the validator control when dropped on a form.
Add the JavaScript file

This is the JavaScript file that will be served whenever our validator is used on a page. We will embed this file as a WebResource in the library to save ourselves adding it manually to every page that uses our validator.
To know more about WebResources have a look at WebResource ASP.NET 2.0 explained .
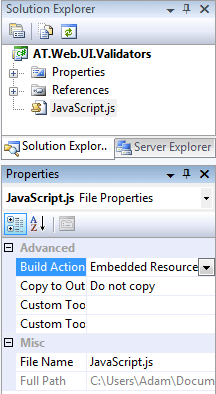
Now add a JavaScript file and call it JavaScript.js then change its build action to be “Embedded Resource.” In the AssemblyInfo.cs file you need to add a line that will make this JavaScript file a WebResource, first add a reference to the name space using System.Web.UI; then append this line to the end of the file:
[assembly: WebResource("AT.Web.UI.Validators.JavaScript.js","application/x-javascript")]Step 1 will only be done once and the next time you add a new validator you won’t need to do it again.
Step 2: Write the ASP.NET Validator
Add to the project a class file and call it CreditCardValidator.cs. The code that should go in the class looks like the following, I will discuss the code later:
// CreditCardValidator.cs
using System.Text;
using System.Web.UI.WebControls;
using System.Web.UI;

namespace AT.Web.UI.Validators {

// Tells VS that when the control is droped
// on the form, it should look like this
[ToolboxData(@"<{0}:CreditCardValidator runat=server />")]

// Best way to start your own validator is to inherit BaseValidator
public class CreditCardValidator : BaseValidator {

// This method will be executing while the attributes are being rendered
// and the HTML is being generated. This method should always be overriden
// to supply the name of the client-side check function.
protected override void AddAttributesToRender(HtmlTextWriter writer) {
    base.AddAttributesToRender(writer);

    // Checking if the browser supports JavaScript
    if (RenderUplevel) {
        // This will "attach" an attribute "evaluationfunction" and gives
        // it a value "CreditCardNumberValidatorEvaluateIsValid" which is the
        // JavaScript function that will be called to validate the TextBox
        Page.ClientScript.RegisterExpandoAttribute(ClientID,
            "evaluationfunction",
            "CreditCardNumberValidatorEvaluateIsValid");
}
}

// This method will be called when the server-side checking is triggered
// and should ALWAYS be implemented to return true or false.
protected override bool EvaluateIsValid() {
    string cardNumber =
    this.GetControlValidationValue(ControlToValidate);
    if (!IsValidCardNumber(cardNumber)) {
        return false;
    }
    return true;
}

protected override void OnPreRender(System.EventArgs e) {
    // emit the JS file into the page so you won't need to add it manually
    Page.ClientScript.RegisterClientScriptResource(
        typeof(CreditCardValidator),
        "AT.Web.UI.Validators.JavaScript.js");

    base.OnPreRender(e);
}

// Luhn check algorithm which will check the
// validity of the Credit Card #
private static bool IsValidCardNumber(string cardNumber) {
    if (!System.Text.
        RegularExpressions.Regex.IsMatch(cardNumber,"^[0-9]*$")) {
        return false;
    }
    int length = cardNumber.Length;

    if (length < 12) {
        return false;
    }
    int sum = 0;
    int offset = length % 2;
    byte[] digits = new ASCIIEncoding().GetBytes(cardNumber);

    for (int i = 0; i < length; i++) {
        digits[i] -= 48;
        if (((i + offset) % 2) == 0)
        digits[i] *= 2;
        sum += (digits[i] > 9) ? digits[i] - 9 : digits[i];
    }
    return ((sum % 10) == 0);
}

}

}
And the JavaScript.js file:
// This function shall be called for client-side validation
function CreditCardNumberValidatorEvaluateIsValid(val) {
    var cardNumber =
    ValidatorTrim(ValidatorGetValue(val.controltovalidate));
    if (!IsValidCardNumber(cardNumber)) {
        return false;
    }
    return true;
}

// Luhn check, the JavaScript way
function IsValidCardNumber(cardNumber) {

    var digitsRegex = new RegExp("^[0-9]*$");
    if (!digitsRegex.test(cardNumber)) {
        return false;
    }
    if (cardNumber.length < 12) {
        return false;
    }
    var sum = 0;
    for (var i = 0; i < cardNumber.length - 1; i++) {
        var weight = cardNumber.substr(cardNumber.length -
            (i + 2), 1) * (2 - (i % 2));
        sum += ((weight < 10) ? weight : (weight - 9));
    }
    if (parseInt(cardNumber.substr(cardNumber.length - 1)) ==
        ((10 - sum % 10) % 10)) {
        return true;
    }
    else {
        return false;
    }
}
What is this code all about?
When implementing ASP.NET validators, your best candidate to inherit from is the BaseValidator. And you should always, at least, override these three methods: AddAttributesToRender, EvaluateIsValid and OnPreRender.
The JavaScript in our case matches the C# code to do the same check on the client. Note that the JavaScript is using ValidatorTrim and ValidatorGetValue which are methods that are available to you via the framework.
The reason behind both server and client sides checking is because:
- The user will have an old browser or JavaScript turned off, so in all cases, the server-side check would still execute. You don’t want to be at the mercy of your web users, do you?
- The JavaScript will help informing the user as soon as he changes focus or clicking submit that his entry is invalid and saves the page to do a round trip to the server.
Step 3: Use the Validator Control

Now that you have created the validator you will need to test it and use it. So, create a web project and then add the class library that you have created in Step 1 to the solution. Add a reference from the web project to the class library project (not to the .dll).
You will need to add this line to the web.config inside your system.web section:
<system.web>
    <pages>
        <controls>
            <add tagPrefix="at"
                namespace="AT.Web.UI.Validators"
                assembly="AT.Web.UI.Validators" />
    ...
This will instruct ASP.NET that whenever there is a tag that is prefixed with “at” then it should be fetched from namespace AT.Web.UI.Validators that exists in assembly AT.Web.UI.Validators.dll.
Drop it on the page
Add the following code to the “default.aspx” page.
<asp:TextBox runat="server" ID="CreditCardNumber" />
<at:CreditCardValidator runat="server"
    ControlToValidate="CreditCardNumber"
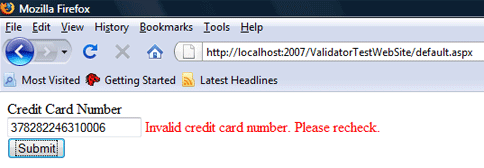
    Text="Invalid credit card number. Please recheck." />
<br />
<asp:Button runat="server" ID="Submit"
    onclick="Submit_Click" Text="Submit" />
Download
I have added the source code with Visual Studio 2008 solution and the assembly file using .NET Framework 2.0, feel free to download it and use it. However, all copyrights should be given when needed.
Credit Card ASP.NET Validator (11 kb)
Disclaimer
I tried to ensure that the information posted here are up to date and accurate, however, I do not hold any responsibility to any damages that might occur from using or misusing the information and the posted code.
What is next?
In the next post I will be discussing the validators secrity holes… If you liked what you’ve seen so far, then let me know in a comment so I would discuss it in the next post.
UPDATE: How Not To Compromise Security Through ASP.NET Validators.